To the DIY gods: why can't they make an affordable heat sink?
Those very words poured from my lips many years ago.
I had just discovered the joys of class-A audio--had even fabricated the lovely blue horn you see on my home-page. It didn't take long for me to crave the smooth sound, that proverbial, liquid refinement promised to me in the form of a Class-A amplifier.
It came as quite a shock when I learned why Class-A is a rare bird: everything is huge! The heat sinks are especially large. And like the immutable laws of consumer marketing: if it's big, it's expensive.
Time for some good ol' brain-storming...
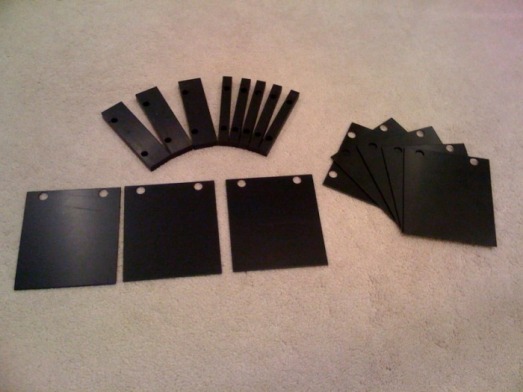
In the picture, above, you see three of the four primary ingredients required to fabricate your own very large heat sinks. The fourth item is a pair of threaded rods--you'll want nuts and washers for the ends. If your heat sinks don't need to be longer than a foot, you can locate carriage bolts from any well stocked hardware store that will be easier to work with than threaded rod. The non-threaded end of the bolt has a pleasant rounded head that is easy to conceal beneath a faceplate.
Here's another picture:
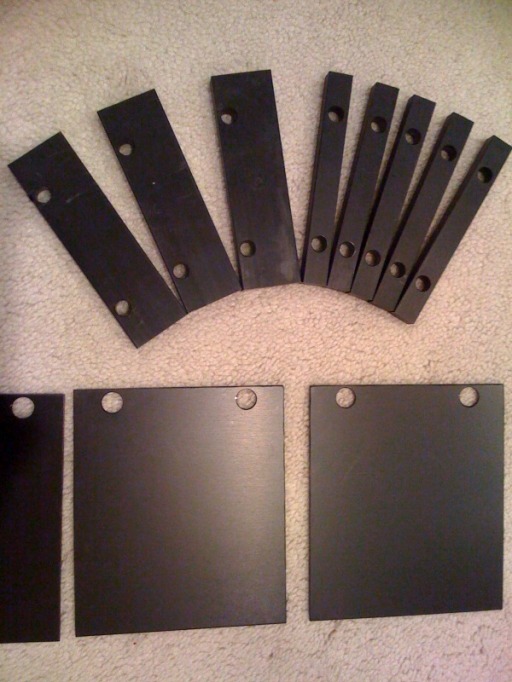
This is a closer look at the bolt holes in the ribs and spacers. I over-sized the holes in the ribs slightly to remedy alignment issues, therefore, reduce my workload by half. No matter how accurately you manufacture these components, it seems there will always be one that is off just enough to trip you up. When you slide these parts onto the bolt, don't hesitate to remove a sticky component and file out the hole. Your day will roll along a lot easier.
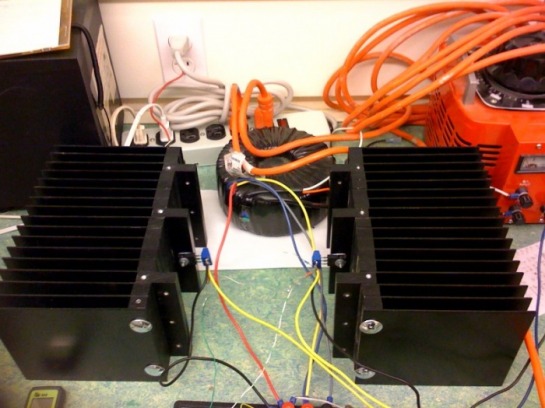
This is what the finished product looks like. I have a cousin, Alan, who worked in an anodizing shop apply the finish for me. He was nice enough not to charge for his time... bless his heart!
I located the aluminum at a scrap yard for pennies on the dollar. Each heat sink cost me $10.00 in aluminum. Add the carriage bolts and I'm probably into the piece for $14.00. Hard to beat, huh?
Notice how I mounted the transistors. You can make that particular spacer a bit wider and mount the transistor on the end, rather than the side. It's all a matter of preference.
At any rate, have fun...