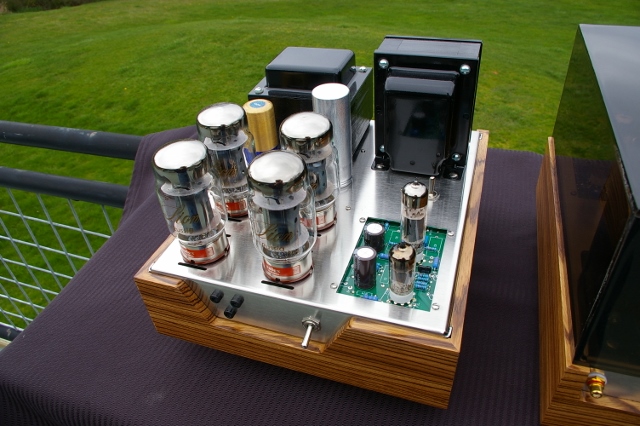
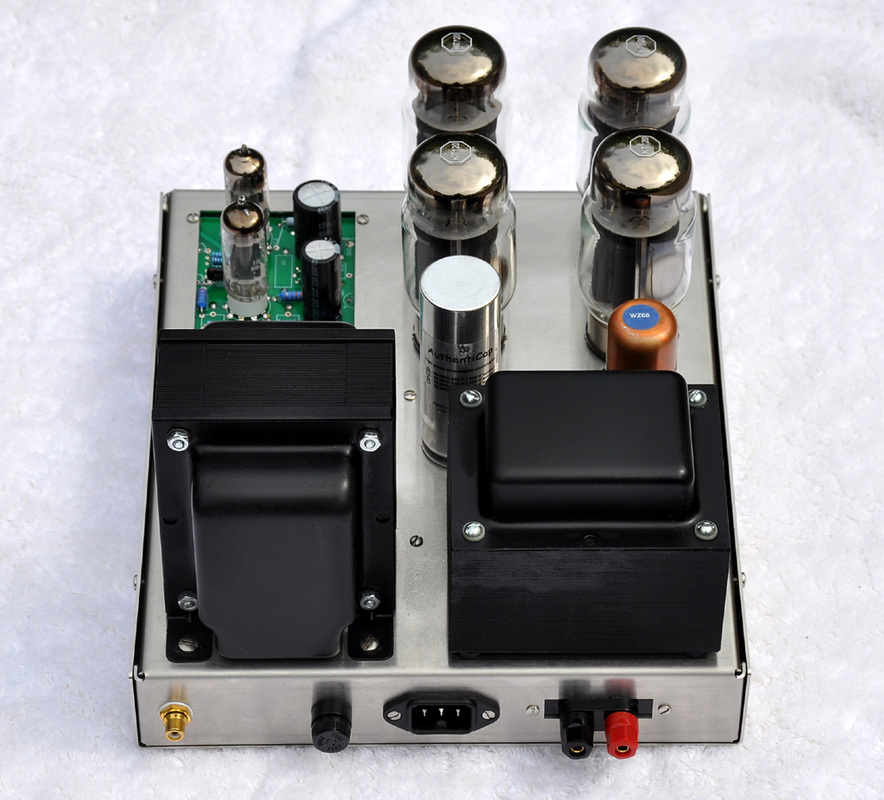
125 Watt KT88 Tube Amplifier
I just completed building Bob Latino's fabulous M-125 (125 watt per monoblock) tube amplifiers. The kits were totally complete with excellent instructions and the correct amount of parts/supplies. I purchase the tubes from him too: a quad of matched KT88 and a pair of 12AU7 devices for each monoblock. I used a picture linked to Bob's amplifier page that had excellent visual information regarding the proper wires to twist together (all AC carrying wire are twisted together, and the picture is posted at the bottom of this page).
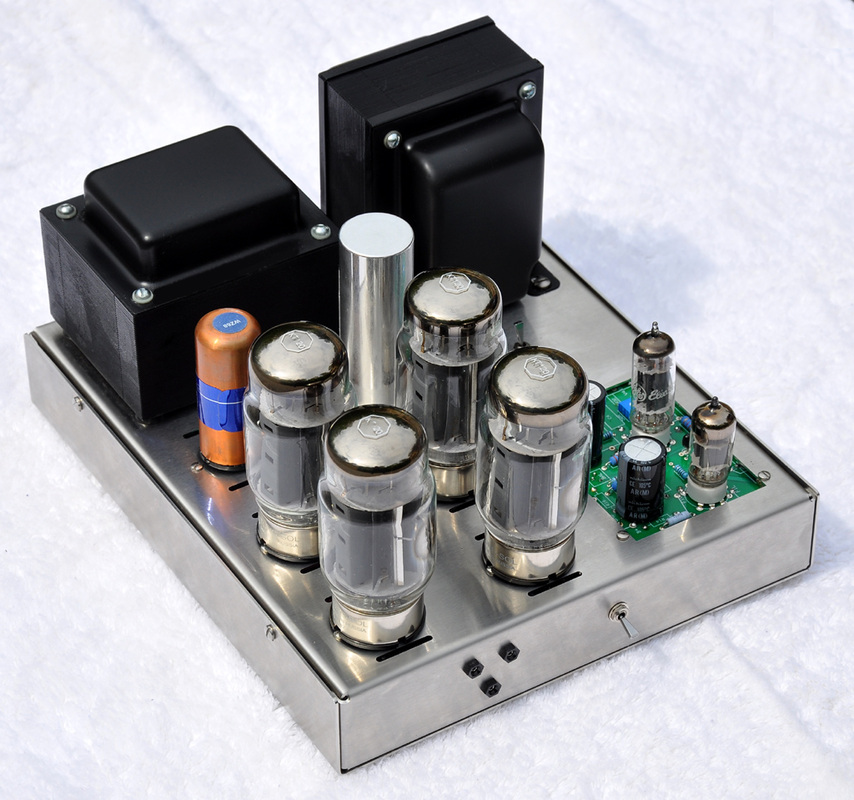
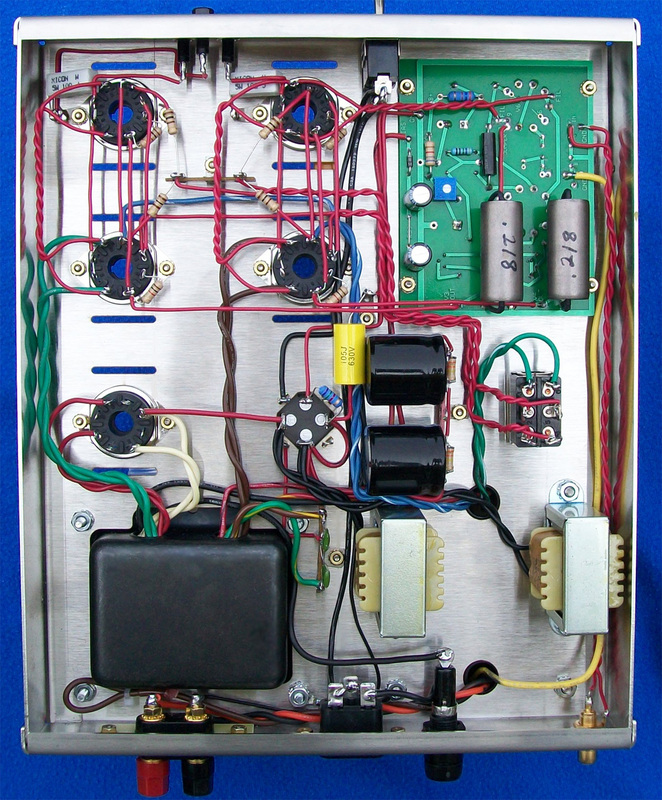
In the picture, below, you can see that I've populated the chassis with the physical components, minus the wiring and driver pcb. I'm resting the power transformer on a 3/4 inch piece of plywood to keep things level. The weight of the transformers hold the project upright--yes, they're large and quite heavy. Note: NEVER pick up an extremely lopsided load from the lighter side; it'll fall out of your hands. Always support the heavy end with your hands/fingers.
In the picture, below, you can see that I've populated the chassis with the physical components, minus the wiring and driver pcb. I'm resting the power transformer on a 3/4 inch piece of plywood to keep things level. The weight of the transformers hold the project upright--yes, they're large and quite heavy. Note: NEVER pick up an extremely lopsided load from the lighter side; it'll fall out of your hands. Always support the heavy end with your hands/fingers.
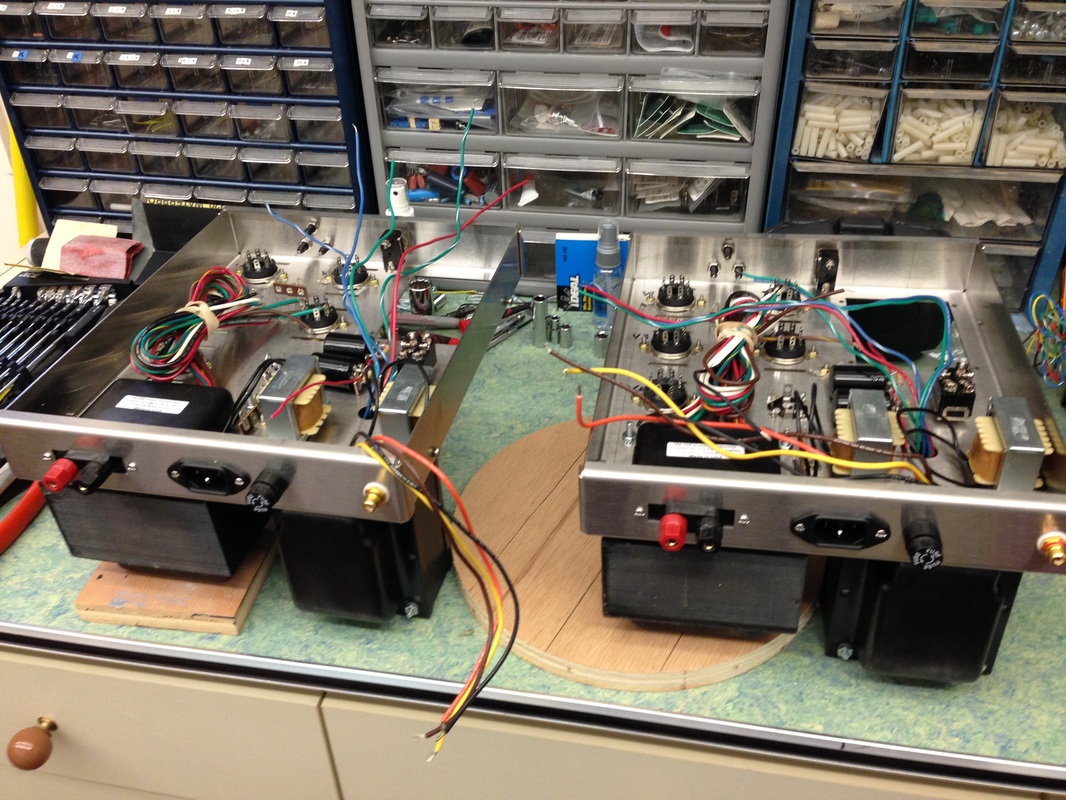
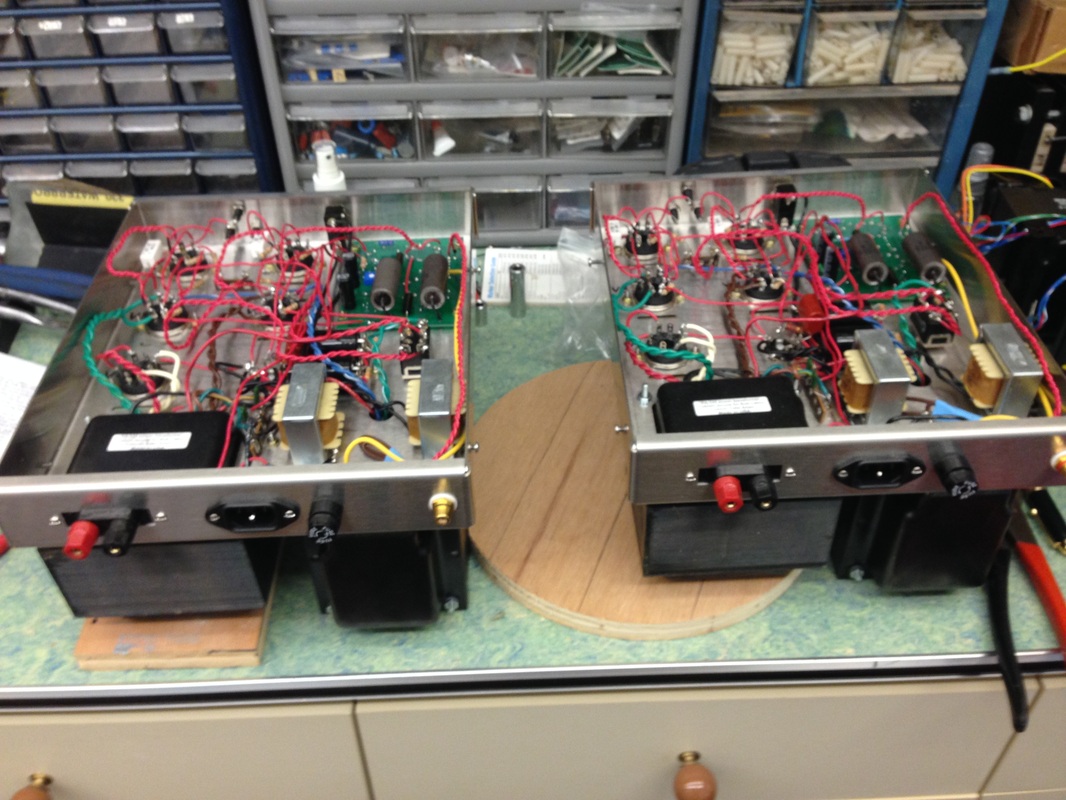
Then came the wiring phase. It's pretty detailed and there's a lot more going on than a casual glance would indicate. Still, a little patience and a week's worth of spare time yielded these beautiful monoblocks.
Auditioning the M-125s
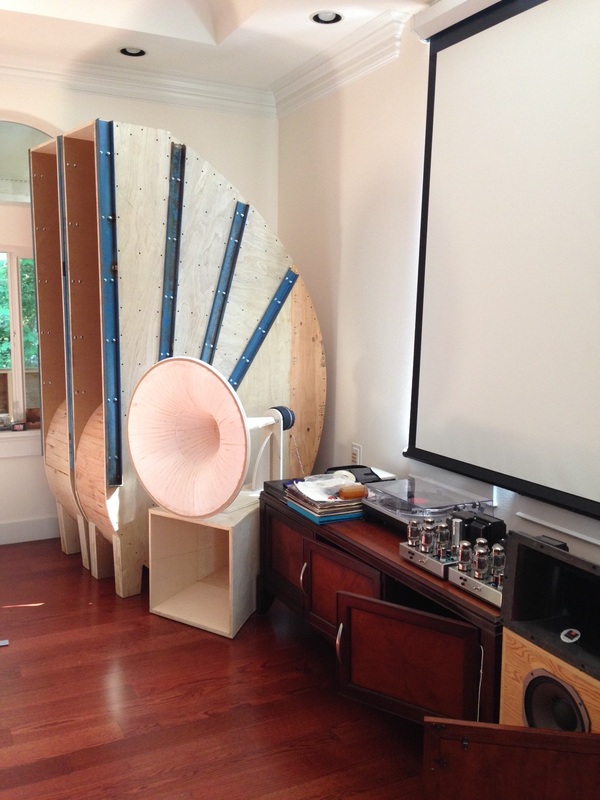
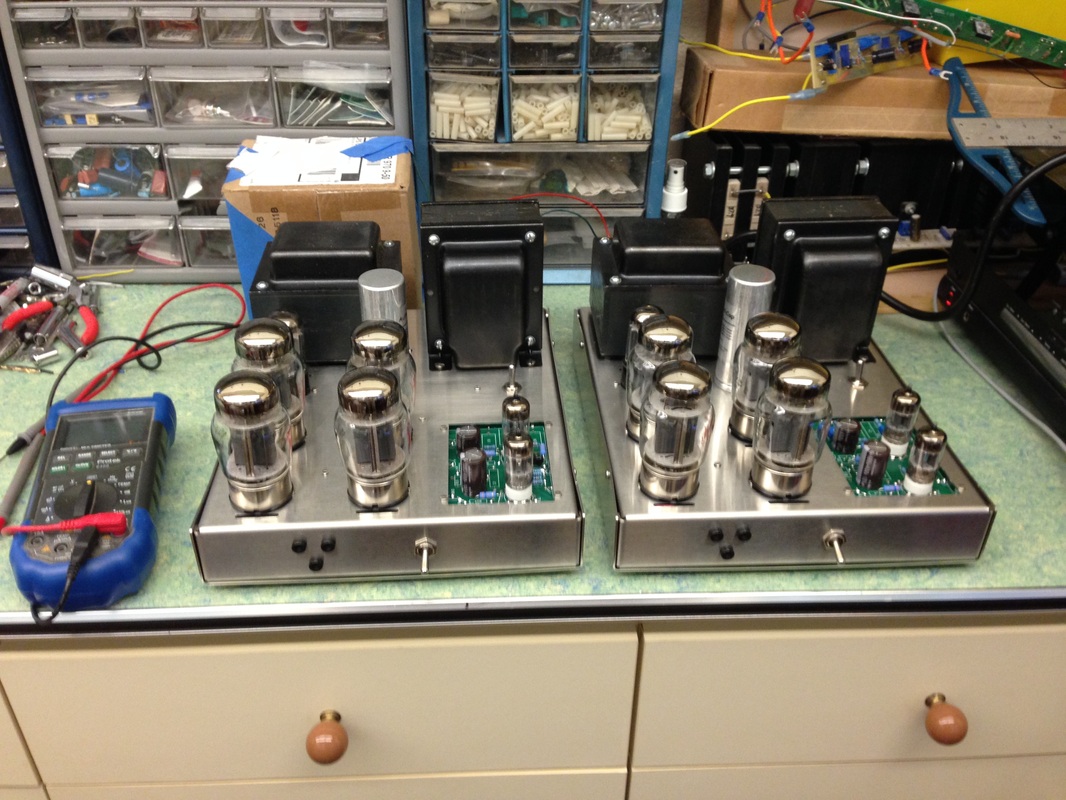
My spiral bass horn, in the background, is being driven by a pair of M-125s (foreground on top of the credenza). Each of the two segment of the horn houses a single Lab 12 driver, hence, the need for a pair of monoblocks.
The first time I powered up the M-125s I knew I had a remarkable dialing-in session awaiting me. Still, something was amiss--the power was there, but the bass notes were rather rounded, bubbly, loosely sprung, so to speak. Kick drums didn't clobber, they just enveloped me like a huge musical amoeba.
It took several days of listening, tinkering, and pondering before I stumbled upon the easiest solution of all: reverse the M-125's speaker connectors 180 degrees. You see, Bob's amplfier are non-inverting. The mid-bass amplifier is possibly inverting. If not that, then it's a phase issue because the sub/mid-bass crossover is 4th order for the sub and 2nd order for the mid-bass. Either way, it's a phase issue, and wrecking havoc on the audio output-- cancelling out a great deal of dynamics between the mid-bass horns and the spiral bass units.
After switching the polarity of the speaker wires, the beast roared to life! Kick drums hit me in the chest--HARD! Oh boy.... I was positively delighted. The bottom end can hit 112 db 1watt/1meter without breaking a sweat.
I had been operating the spiral horns with a Hafler Transnova P7000 pro amplifier. I'm here to tell you, the M-125s hit just as hard, and they capture the delicate bass nuances that I find so appealing. There's a certain "thrust" that the M-125s posses that the Transnova lacks.
In the near future, I'll be parting with the M-125s, they're a project for a customer, but you can bet there will be another pair sitting on my credenza, soon. I can't praise Bob Latino enough--his desire to design a powerful tube amp and produce a complete kit had to be quite the adventure. I wish him the best of luck.
Parting shots, courtesy of Bob Latino:
This is a photo of Bob's wiring that I attempted to emulate; it has to be the neatest point to point wiring that I've ever seen. Beautiful job! Notice how he insulated the leads on some of the point to point resistors? This is extremely valuable information for someone getting into tube audio.
Here's a custom chassis shell I saw posted on Bob's Dynaco forum, and fell in love with:
The fabricator of this amplifier chassis is a true artisan. Such imagination!