Inlow Sound Folded bass horn
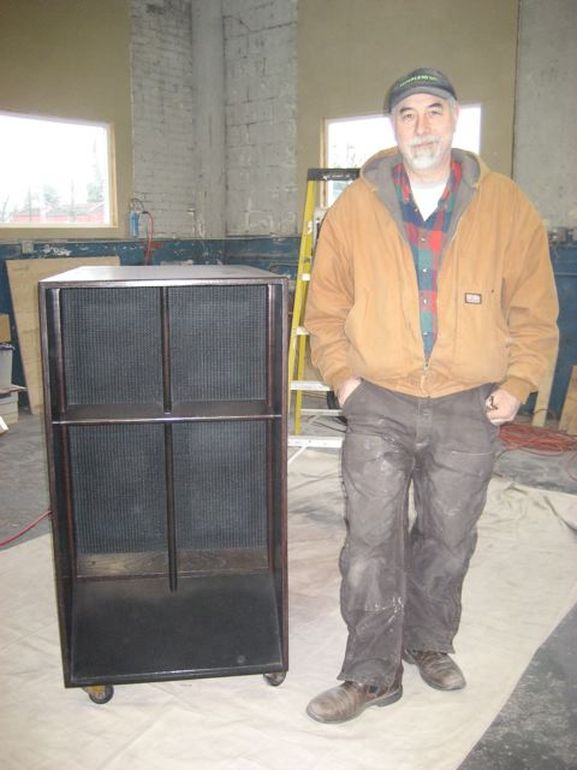
Well, there I am looking tired, but pleased that this project has reached completion. I began this quest when my brother, who is the drummer in his Christian rock band, PureFusion, proposed that I design and fabricate a bass horn for his band's PA system. Needless to say, I jumped at the opportunity.
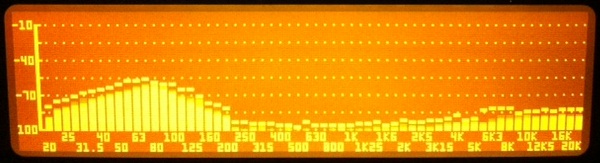
Here's how the Real Time Analysis checked out.
Here's the RTA analysis of this horn without EQ (below) taken one foot from the horn's mouth. Notice the dots above the curve? Those are "peak hold" indicators. Pink noise rolls up and down like a boiling cauldron. Peak hold allow you to see what's available, db wise, over a period of time. In this case, I gave the test about 10 seconds of run time.
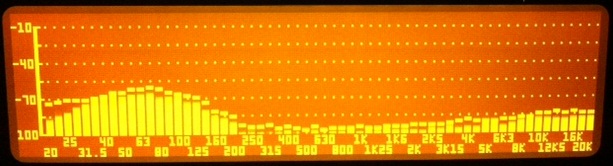
Below, you can see the RTA analysis of this horn with 6db of parametric EQ at 20 hz with a rapid cutoff--no boost above 30 hz. Obviously, as you can see from the high frequency anomalies, I don't live in a anechoic chamber. Also, I ran this test with the volume down low. My wife would kill me if I were to turn this noise up to a respectable level! ;-) As you can see, this horn responds to EQ rather well.
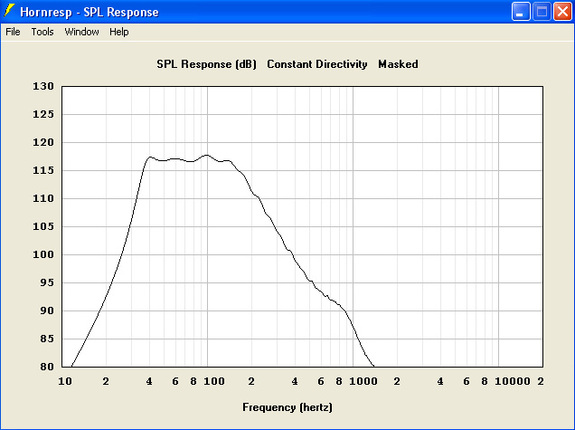
It all began with Hornresp, which led to a simple bi-conical horn with a throat adapter.
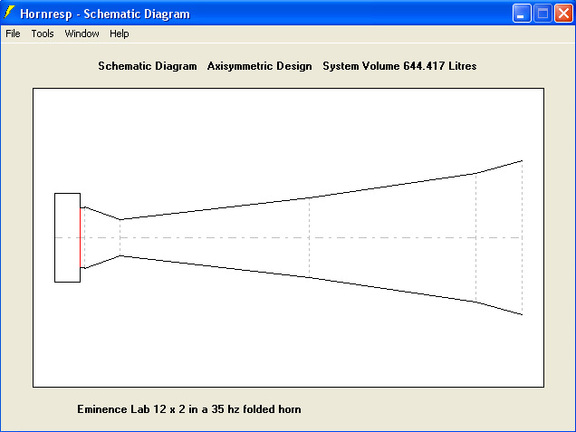
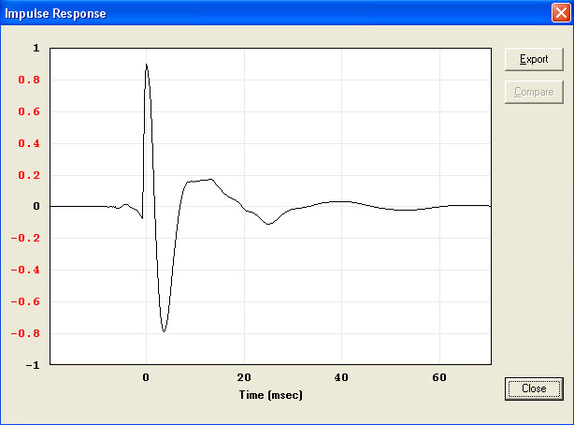
I tweaked the software to get the smoothest SPL curve, a strong impulse response, great extension, and still be reasonably easy to fabricate. Even though the SPL graph depicts the low end roll off at 35hz (3 db down), I think the horn, when corner loaded (especially when against a concrete wall), is capable of far greater extension. I fired it up with a mere 125 watts and played a CD used for testing car sub-woofers. I heard all the synthesizer bass notes; nothing seemed weak, or absent. Another bonus came in the form of "punch" -- this baby slammed so hard that the entire warehouse space, and the interior offices as well, came alive with concert level bass--I couldn't help but wonder what would happen with a 1000 watts.
I also managed to achieve a strong impulse response.
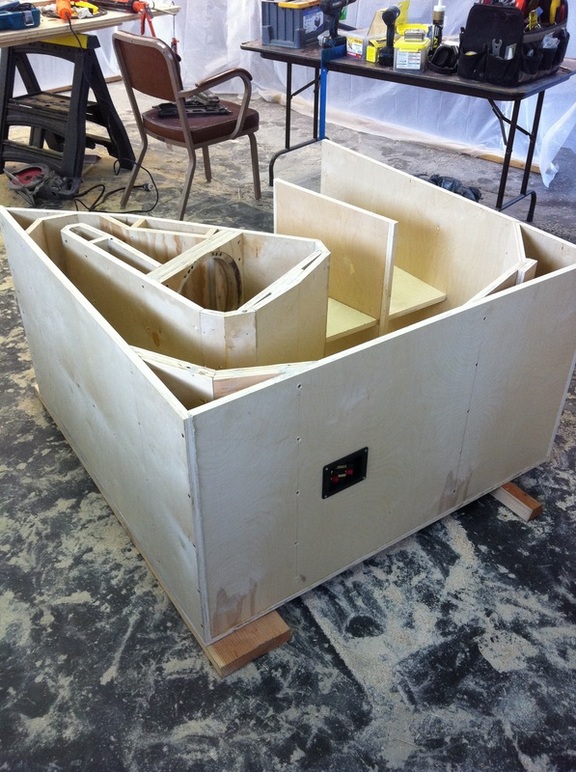
Then came the task of converting/crunching Hornresp's schematic data and drawing the prints to build this bad boy. It takes about three and a half sheets of plywood to complete the fabrication process, and lots of PL polyurethane caulking and Tightbond glue.
I've heard mentioned that my horn resembles a LAB-12 unit, but a cursory glance at these drawings should dispel that notion. My horn's throat is smaller, and my horn's inner width is 24-3/4" rather than the LAB-12's 20". Furthermore, it's obvious that I used Hornresp to engineer this design; I added my creative skills with the layout. There's quite a few more cuts to make with my horn, so it's not for the impatient/restless at heart.
This baby sings -- I mean, I've never heard a horn that loves the lower octaves to this degree. When my brother's bass guitarist moved to the lower strings, the bass grew louder, and it wasn't EQ, I experienced the same powerful bottom end when I fired it up in the shop; a very happy experience to say the least.
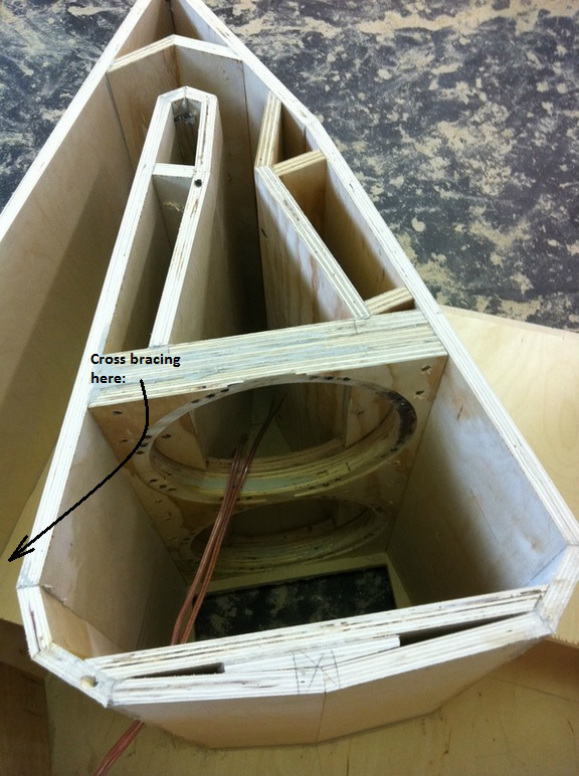
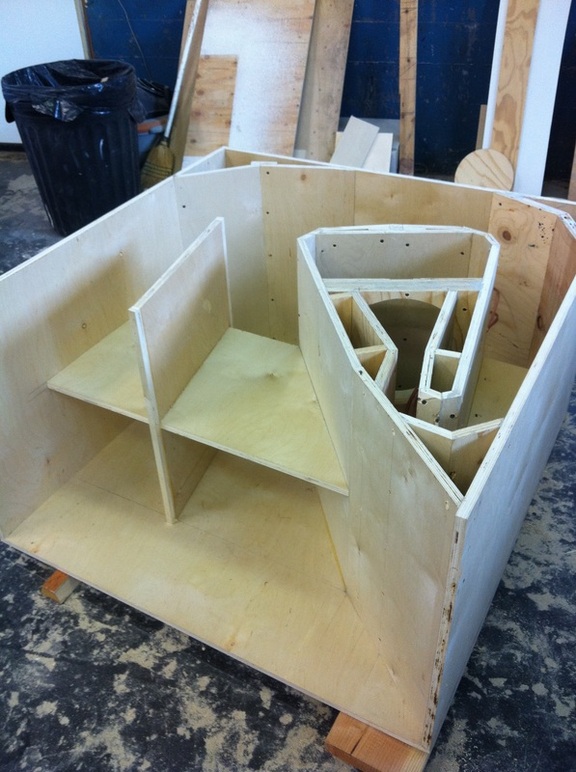
One last thought: this horn requires massive internal bracing -- shown in the graphic, below. If you don't brace the panels, the horn will resonate, and won't sound pretty... ask me how I know. ;^)
I've heard mentioned that my horn resembles a LAB-12 unit, but a cursory glance at these drawings should dispel that notion. My horn's throat is smaller, and my horn's inner width is 24-3/4" rather than the LAB-12's 20". Furthermore, it's obvious that I used Hornresp to engineer this design; I added my creative skills with the layout. There's quite a few more cuts to make with my horn, so it's not for the impatient/restless at heart.
This baby sings -- I mean, I've never heard a horn that loves the lower octaves to this degree. When my brother's bass guitarist moved to the lower strings, the bass grew louder, and it wasn't EQ, I experienced the same powerful bottom end when I fired it up in the shop; a very happy experience to say the least.
One last thought: this horn requires massive internal bracing -- shown in the graphic, below. If you don't brace the panels, the horn will resonate, and won't sound pretty... ask me how I know. ;^)
I purchased 3/4" plywood and began the layout. Notice the clamps? I stacked the side panels directly on top of one another and drilled holes through both sheets where screws would eventually secure the inner baffles that create the horn's flare.

Notice the speaker cutout in the drawing, above? There are T-nuts buried inside the 2-1\4", three layer, plywood sandwich. To keep those T-nuts from breaking loose, I added a screw to both sides. Which brings up an excellent point: use quality T-nuts. I'm not satisfied with the type you find in the local "Box stores", and have discovered that Parts Express sells a superior product. I've never had a T-nut from Parts Express strip out, or twist out of it position -- but then again, I use the securing technique mentioned above.
As it stands, this horn's more than twice as efficient as my left channel's monsterous eight foot tall tapped horn and has much sharper sounding transients and twice the punch. The kick drum doesn't go boom, it goes BOOM!
I'm extremely impressed! When compared, it projects the low end, note for note, as well as the tapped horn and does so with the amplifier set 5db lower than that of the tapped horn. This is a device you should have in your system, assuming you have the desire for live sound in your listening environment.