DIY Inlow Sound 100hz mid-bass horn with B&C 12PE32
For most of my fellow horn aficionados, my 80hz mid-bass horn is simply too large.
So, to that end, I present a smaller, but just as potent 100hz version. Because it's smaller, it can be fabricated with greater ease than its 80hz cousin.
So, to that end, I present a smaller, but just as potent 100hz version. Because it's smaller, it can be fabricated with greater ease than its 80hz cousin.
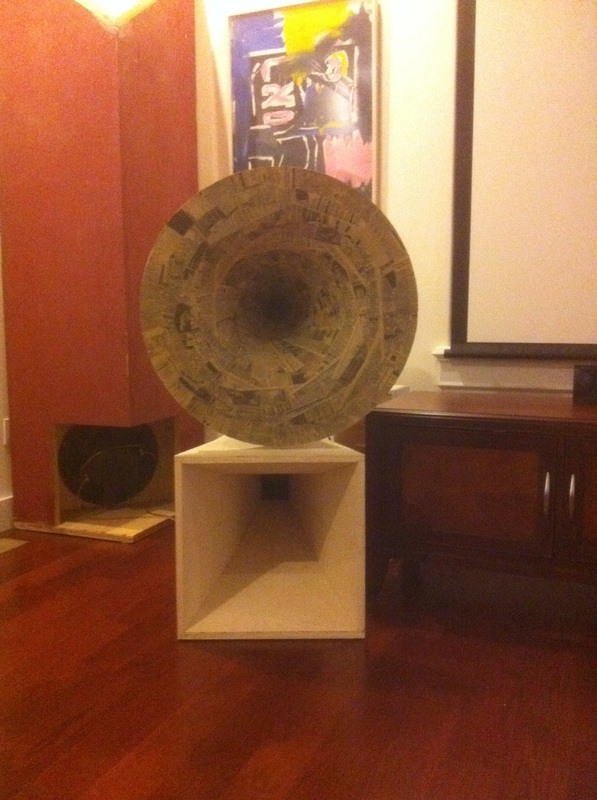
Check out the picture, below: yep, that's what it looks like--pretty small compared to the other horns on this site. Boy does it sound good, though. The drum transients and rim shots are SNAPPY; no other mid bass horn I've fabricated with a 12 inch driver can match it's response. Because of its height, the paper mache horn's axis is in a favorable alignment with my ear, which I find to be a bonus (imaging is more pronounced). The response is also smoother than other large driver, mid bass configurations and has far less distortion.
After a day and night of playing hard, the cone is finally beginning to loosen up and I'm getting more lower mid bass as a result. the sound is becoming more mature (ha, just try to figure out what that means ;-)
1/22/2012: I completed the second, matching, 100 hz horn, today, and installed it into my sound system. I turned on the projector/blue ray, loaded up an Eric Clapton concert and set it up for DTS. Wow! Needless to say, I'm in love with the results. The imaging, sound stage, and accuracy all combine to create an immersive experience, one where I'm literally at the concert.
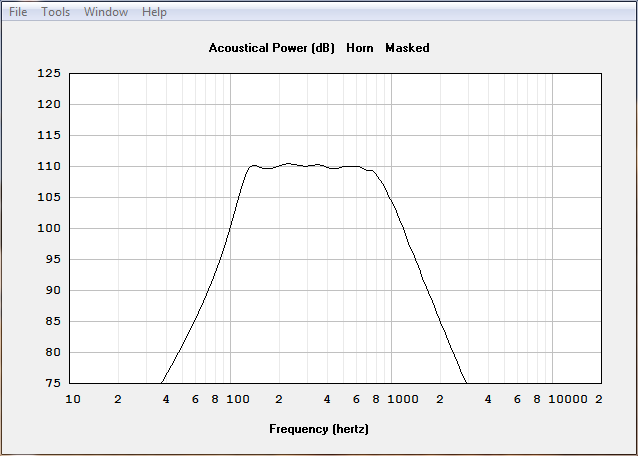
Out of curiosity, I ran an RTA (Real Time Analysis) today. I placed the mic on a small box about a foot away (close to the horn's center axis), fired up the pink noise, and here's the results in real time. This graph portrays almost the same results as those modeled by Hornresp. Fantastic software.
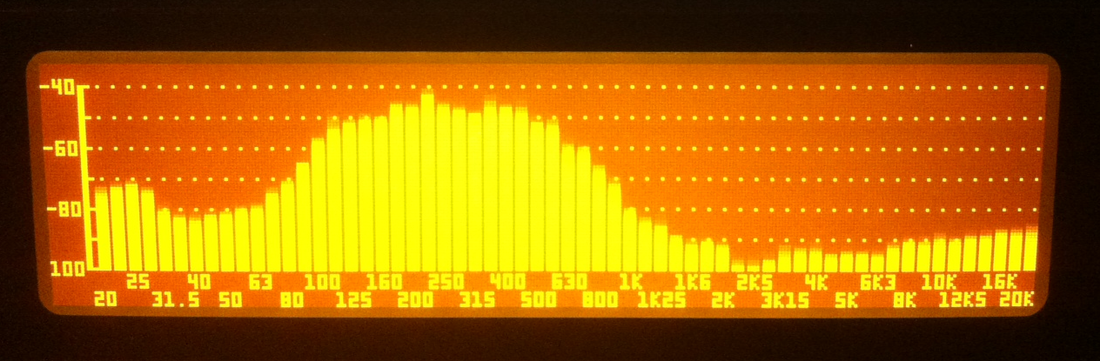
Here's the projected response, below:

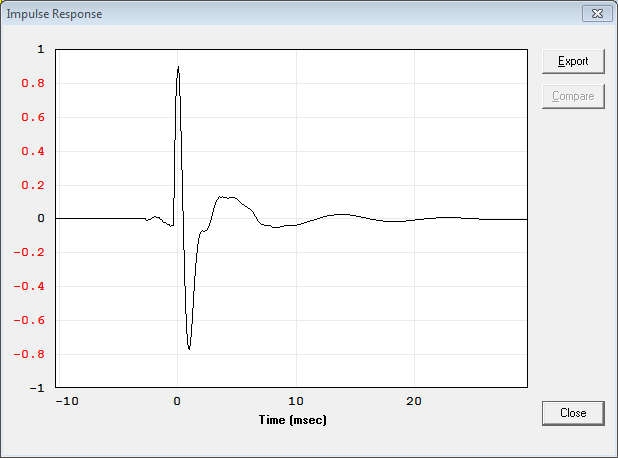
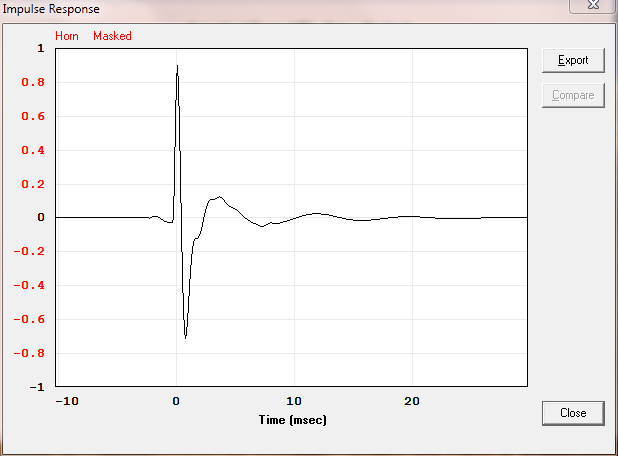
Here's a beautiful impulse response: There's plenty of extension in both directions of the input signal, and the resulting sound wave settles down around 20 milliseconds.
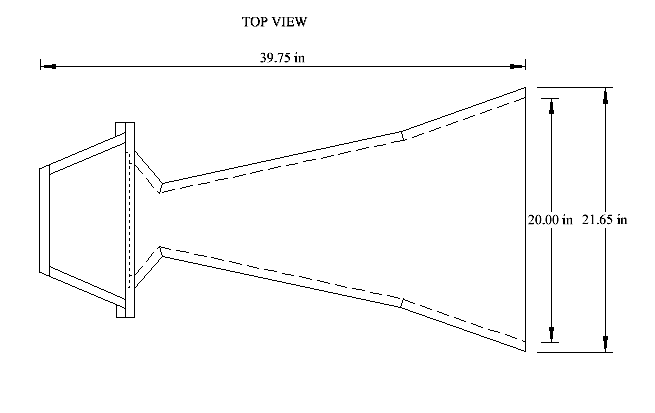
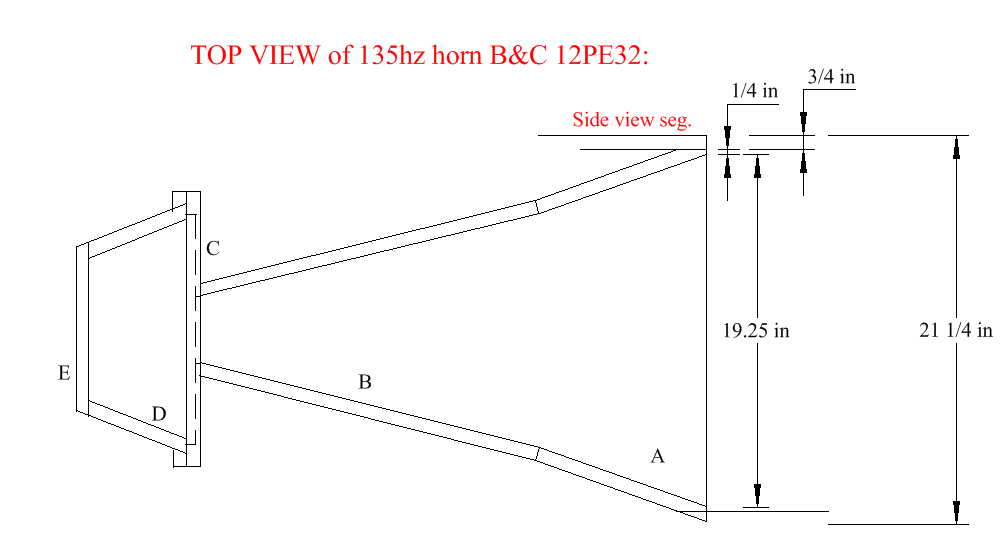
Here's the horn's space requirements:
There's always an alternative:
If you're able/willing to sacrifice bass extension, you can get greater upper bandwidth and cleaner mid-range. First thing to go is the adapter chamber. Second: tighten up the compression chamber. It uses an octagonal shaped chamber (much like the 8" version of this horn). Overall, it's a bit smaller than the 100 hz horn, but still packs a punch.
If you want super crisp response:
Slip on over to my 135 hz mid-bass horn page and scroll down to the bottom of the page. I present a 4 x 8 inch, 100 hz horn that uses four B&C 8PE21 drivers. It's longer than the 100 hz horn on this page, but I believe it's a monster performer.